Its been a while between posted but i have still be dipping into some 3D art whenever I can find that time. I focusing my efforts on learning ZBrush at the moment.

I'm running through the book "Introducing Zbrush by Eric Keller" So far i'm finding it very easy to follow. I've at a bit of a play in Zbrush in my last couple of projects, just I've already picked a bunch of thing that would have been useful to know. Such as Dynamesh and Subtools !!

I've also decided to invest in a Wacom tablet to assit with my sculpting, so that should arrive in the next few days and I'll have a new toy to learn with :)

Here are a couple of WIP screens of a Lizard Beast i'm creating as I work my way through the book.

Basic Head Sculpt

 
Experimenting with Horns and Teeth

 
Better looking horns

 
Adding a Z-Sphere Body

 
Inital Body Sculpt

I have just finished my recent project which I call 'Mind Fields' I wanted to make a detailed post outlining the work flow I took to get to the end result. I dedicate this to my sister who complained about my last piece and said I should make something 'pretty'. So I wanted to show her that 'brains and eyeballs' could be pretty too ;)

1 - Initial Modelling

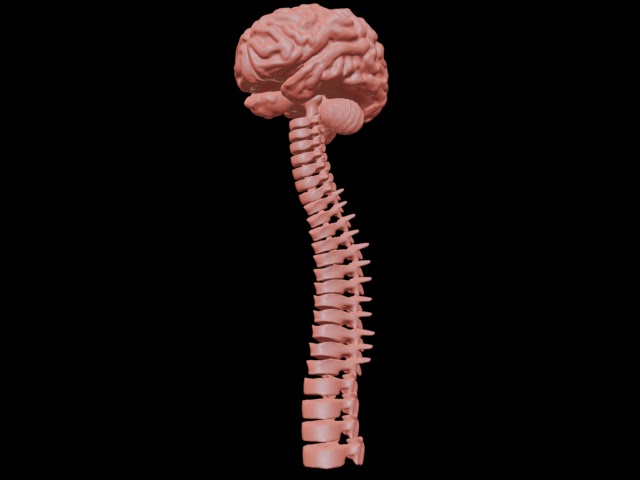
I had already modelled the brain and spine in my last piece using Zbrush, I just needed to create the 'coxic' bone at the end of the spine which I did in 3D Max along with the rest of the scene. I knew I was going for a stylised scene so I didn't need to focus on too much detail.

I modelled wings using boxes and I used the loft object for the flower stem and I created the main flower petals using box modelling as well.

I used the bend modifier to shape the petals, wings and bend the 'butterfly' spines into the correct shape, so they appeared to be flying around the flower.

I used a capsule primitive for the rock then applied a noise modifier to give it an uneven surface.
 
Wing with base material

 
Eye ball with eyelid


2 - Modelling Detail and Base Materials
 
The next part of my work flow involved adding some more detail to the scene and getting some base details into the project.
 
I used the fantastic free plug in for 3ds max 'Grass-o-matic' I'll add a download link soon! With a bit of playing around I add a grass surface to the rock.
 
I also created a 'sky dome' using a half sphere with the normal modifier applied. I have it a gradient material then I created a bunch of atmospheric gizmo's to create the clouds.
 
I found a great tutorial on this process here - Creating Volumetric Clouds.
 
I also added some simple models for additional details, small flowers in the grass and hanging flowers off the rock and of course added my 'eyeball flower' to the centre of the rock.
 
Base Scene with Sky Dome and Clouds


3 - Materials and Textures
 
The third part of my work flow was to create materials for all the various parts and get things looking 'pretty' I wanted something bright!
 
I used UVW Unwrap modifier to get a base texture template for the wings, the took the template into photoshop to create the patterns for the wings.
 
I also created various textures for the spines and brains, nothing too complex, I just stuck to my idea of bright and colourful.
 
UVW Template
 
 
Wing Photoshop Texture
 
 
Brain-Butterfly Material Layout
 
 
Textured Butterfly


4 - Particle Effect
 
The next step was to create some particle trails for the butterflies. I used the max particle system to do this and created some spiral loft objects to act as the paths and particle emitters.
 
It was a standard flow, with 5-side star shape at about 130 amount with some random rotation.
 
I applied some mental ray glow materials to the particles to get a bright effect.
 
 Particle View for the 'star trails'


Particle Test Render


5 - Render, Lighting and Post Production
 
The final part of my work flow is rendering and lighting. I used a standard 3 point lighting system to light my scene, although I modified the sky dome so it would not receive shadows. Here is a great explanation on 3-point lighting setups
 
Mental Ray was the render engine used.
 
I used a final gather at medium, sampling at 16/16 Mitchel and enabled global illumination The final resolution was 2000 x 1500. The render took about 25mins on my beefy laptop.
 
Here are a few test renders that occurred along the way, that show how the project evolved.
 
Butterfly Test Render
 
Flower and Base Scene Test Render


Scene Test Render
 
 
Black Background Test Render
 
 
Sampling Render


The very last part involved a tiny bit of colour correction on the final render in photoshop, and here is the completed image.


So I have finished with the 'Brain' scene. Its not exactly what I had in 'mind' excuse the pun ;) when I first started the project but I did learn a tonne from doing it.

Working with Hi-Poly models definitely makes it harder on your PC and in turn can slow the whole process down. I also experimented a lot with importing and exporting between ZBrush and 3DS Max so lots of good take away points there.

I also learned a lot more about UVWs and the unwrapping process! Getting nice materials is definitely a huge part of a successful final image.

So my next project is going to use some elements from this scene, but will be a lot brighter and hopefully have a warmer feel :)

I will also render out a few more images from this scene when I get a chance.

Here is one final render.


Here is a clay render

So I have been slowly updating my latest scene. There have been a few changes and I find myself moving between modelling and materials. Not the ideal workflow but it helps a lot with my creativity.

I've been wresting with the UVW Unwrap modify which is taking some getting used to but it definitely is must improved in the latest version of 3DS Max, I also like that you can now just render out the UVWs without needing a plugin like texporter as I previously used to use.

Ok so here is my latest render test.

I have started work on a new project. In this project I wanted to get some practice with ZBrush. Initial impressions of the application are good and I can straight away see how powerful it is and how easy it is to create some detailed models.

It definitely is a very different way of working in comparison to 3DS Max, the controls are quite different so its taking a while to adapt moving from one application to the next.

It has also opened up so many questions for me about an integrated work flow between applications. Zbrush seems to have powerful material and poly painting functionality, but can these transfer on the exported models to 3DS max? Time for some forum posting and research.

So onto some WIP images of my latest project. Lots of new techniques and ideas coming through.

Clay render of 'Brain and Spine' modelled in ZBrush


Test render in 3DS Max of my scene


I have been using trial products of Autodesk to do most of my work and until recently I had not looked into the pricing of the products I was using.

I could not believe that the Autodesk 3DS Max 2013 product is over 3K USD!

I understand it is a professional package used by large companies but sure Autodesk can come up with a better price for private users.

I do not profit from any of my work it is purely a hobby interest for me and this price is just way above what I am prepared to pay at this stage. Crazy!
I have completed the 'Scary Fairytale' scene and overall I'm pretty happy with the result. I learnt so much on this project, in particular a lot about rendering and lighting systems. My final render was done with mental ray. 2200 x 1700 resolution with very high final gather and 64/64 sampling. It took approx 5 hours on my laptop to output :)

Here are some render process shots.


Here is a clay render done using the Quicksilver renderer.


And lastly, the final render :)


Next PostNewer Posts Previous PostOlder Posts Home